
In This Article
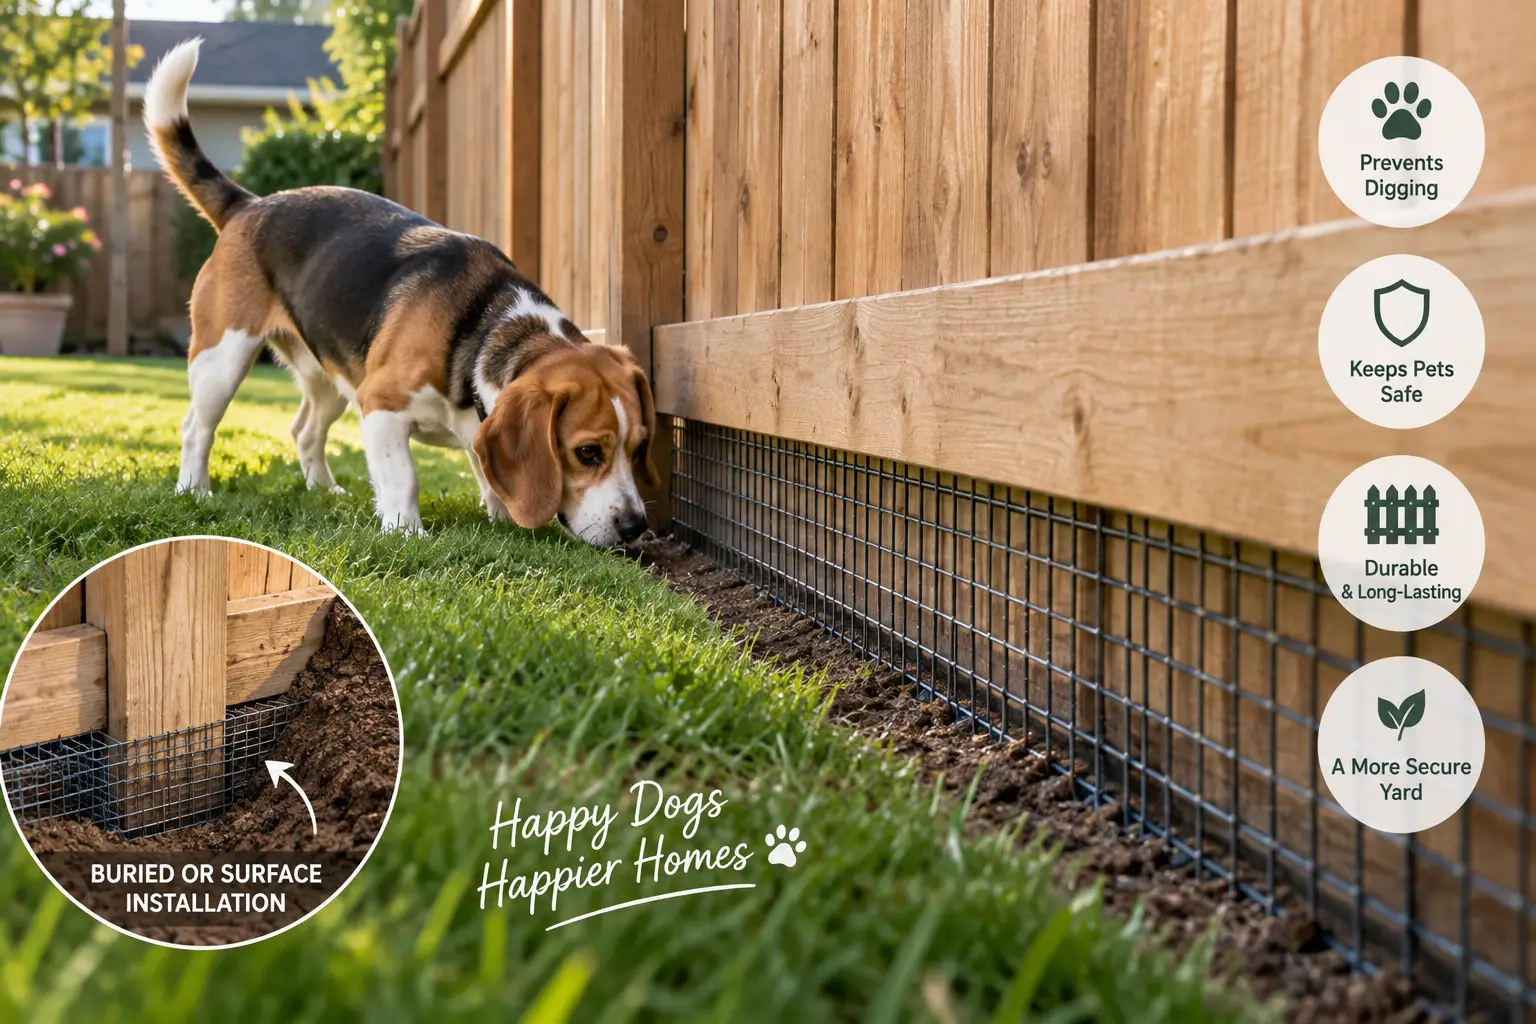
If your yard looks like a minefield and your dog has somehow developed the engineering instincts of a prairie dog, you’re not imagining things — digging under a fence is one of the most common ways dogs escape their own backyards. A dog proof bottom of fence setup is any modification, product, or technique that seals the gap between the ground and the base of an existing fence so a determined digger can’t tunnel through. It can be as simple as a buried strip of wire mesh or as sturdy as a row of galvanized steel stakes driven into the soil.
This guide skips the fluff and gets straight to what actually works. We researched real, purchasable products, compared their specs honestly, and pulled together practical installation advice so you’re not left guessing. Whether you’ve got a scrappy terrier who treats your flower bed like an archaeological dig or a large-breed escape artist who’s already found three exit points, there’s a dog proof bottom of fence solution here that fits your yard, your budget, and your dog’s particular brand of stubbornness.
We’ll walk through seven real products worth considering, explain the difference between no-dig stake barriers, buried wire aprons, and rigid steel edging, and give you a decision framework so you’re not just buying something — you’re buying the right thing. According to Humane World for Animals, dogs may dig under, jump over, climb, or chew through barriers to escape a yard, and figuring out which method your dog uses is the first step toward fixing it. Let’s dig in — pun fully intended.
Quick Comparison: Ways to Dog-Proof the Bottom of a Fence
Before diving into individual products, it helps to see the four broad approaches side by side. Each has a different balance of cost, effort, and durability, and the right pick often depends on how determined your dog is and how much of the fence line needs coverage.
| Method | Typical Cost | Install Effort | Best For |
|---|---|---|---|
| No-dig stake barriers | Around $20–$250 depending on coverage | Low — hammer in, no digging | Renters, quick fixes, moderate diggers |
| Buried wire mesh (L-footer) | Around $25–$70 per roll | Moderate — requires trenching | Long fence runs, determined diggers |
| Rigid steel/metal edging | Around $20–$50 per set | Moderate — hammer-in with clips | Straight fence sections, curb appeal |
| Concrete or gravel trench | Varies widely by yard size | High — mixing, pouring, or hauling gravel | Permanent, extreme-digger households |
Looking at the table, no-dig stake barriers offer the fastest weekend fix with the least labor, which explains why they dominate this category on Amazon. Buried wire mesh, often called an L-footer, takes more elbow grease but tends to hold up better along long, unbroken fence lines where a determined digger has room to build momentum. Concrete and gravel are the nuclear options — expensive and labor-intensive, but essentially permanent once installed.
💬 Ready to stop the escapes? Scroll down to see which barrier fits your dog and your yard — then grab the one that’s right for you.
7 Best Dog Proof Bottom of Fence Products for 2026
Every product below is real, currently available in the US on Amazon, and chosen to cover a range of budgets, dog sizes, and installation styles. Prices shift constantly, so treat the ranges below as a general guide and always check the current price before buying.
1. Dig Defence Original Animal Barrier Fence (Small/Medium, 25-Pack) — the classic no-dig fix
This is the barrier that made “no-dig fence” a household search term, and for good reason. The Dig Defence Original Animal Barrier Fence extends your existing fence line underground without any trenching at all.
Each panel is made of galvanized steel and drives straight into the ground with 2-inch tines, creating a below-grade wall that a digging dog runs into before it can get anywhere near your fence line. A 25-pack covers roughly 75 linear feet, which is enough for a mid-size backyard’s most vulnerable stretch — corners, gate edges, and any spot you’ve already found a hole. What most buyers overlook with panel-style barriers like this one is that spacing matters as much as depth; skipping gaps between panels defeats the purpose entirely, so plan for edge-to-edge coverage rather than spot-treating problem areas.
Aggregated customer reviews consistently describe this as easy to install without tools, though a rubber mallet speeds things up considerably on compacted soil. Reviewers with small-to-medium dogs report it holding up through multiple seasons, while a recurring theme in less favorable feedback is that extremely large or powerful dogs can eventually bend or work around lighter-gauge tines over time.
This is best for owners of small-to-medium dogs who need a fast, tool-free fix and don’t want to dig a trench themselves.
Pros:
- ✅ No trenching or tools required for install
- ✅ Made in the USA from galvanized steel
- ✅ Doubles as a decorative garden border
Cons:
- ❌ Tines may bend under sustained pressure from large dogs
- ❌ Requires overlapping panels for full coverage on long runs
Expect to pay somewhere in the $130–$180 range for a 25-pack covering about 75 feet. For the coverage and no-dig convenience, that’s a reasonable value if your dog falls in the small-to-medium range.
2. Dig Defence Large/XL Animal Barrier Fence — built for big, determined diggers
If your escape artist outweighs 40 pounds, the standard-gauge panels above may not be enough. The large-format version of this same no-dig system uses thicker steel and deeper tines specifically engineered for bigger, stronger dogs.
The heavier-gauge construction means more resistance against bending, and the deeper tine penetration (often reaching further below grade than the small/medium version) makes it harder for a determined digger to simply push underneath. In practice, this means the difference between a barrier that holds for a season and one that holds for years — a distinction that matters most for households with large-breed dogs like Labradors, German Shepherds, or huskies, all breeds commonly flagged as persistent diggers.
Reviews for the large-format panels skew heavily toward owners of big, athletic dogs, with aggregated sentiment noting that installation takes a bit more physical effort (denser tines mean more force to seat them fully) but that the payoff is a barrier that doesn’t loosen after the first hard rain. A common thread in customer feedback is that pairing this with a shallow gravel strip further discourages dogs from even testing the barrier.
This is best for owners of large or unusually strong dogs who’ve already defeated a lighter-duty barrier or fence extension.
Pros:
- ✅ Reinforced gauge steel for large-breed strength
- ✅ Deeper tine penetration than standard panels
- ✅ Pairs well with existing chain-link or wood fencing
Cons:
- ❌ Higher price per linear foot than standard panels
- ❌ Firmer soil requires more effort to seat tines fully
Budget in the $180–$260 range depending on pack size and coverage length. For large-dog households, the extra cost buys real peace of mind compared to a barrier that’s likely to bend within a season.
3. Fencer Wire 16-Gauge Galvanized Welded Wire Roll (4 ft x 50 ft) — the DIY L-footer material
For owners willing to trade a bit of trenching time for maximum coverage per dollar, a roll of heavy-gauge welded wire is the backbone of the classic “L-footer” method that fencing pros and rescue organizations alike recommend.
The 16-gauge galvanized construction resists rust and holds its shape well when bent into an L-shape — flat against the fence, then turned 90 degrees to run horizontally underground. That horizontal “foot” is the key: a dog that starts digging directly against the fence hits solid wire mesh flat under the topsoil, well before it reaches open ground on the other side. At 4 feet tall by 50 feet long, one roll comfortably covers a long stretch of fence line with material left over for the L-shaped footer itself.
Because this is raw material rather than a finished product, there isn’t a large body of “customer review” sentiment about performance in the way there is for pre-assembled barriers — but the L-footer method itself is widely and consistently recommended by pet-safety resources as one of the most effective permanent fixes for digging dogs, precisely because it removes the temptation at ground level rather than just blocking a single access point.
This is best for hands-on owners with a full fence perimeter to protect and a willingness to spend an afternoon with a shovel.
Pros:
- ✅ Covers significantly more linear footage per dollar
- ✅ Rust-resistant galvanized coating for outdoor durability
- ✅ Flexible enough to follow uneven or sloped yards
Cons:
- ❌ Requires trenching and more hands-on installation time
- ❌ Cut edges need to be filed or capped to avoid sharp points
Typical pricing lands in the $40–$65 range per roll. Given the coverage, this is one of the best value-per-foot options on this list if you’re comfortable with a weekend project.
4. YARDGARD 1/2-Inch Mesh Welded Wire Hardware Cloth (24 in x 25 ft, 19-Gauge) — the small-mesh option for puppies and small breeds
Not every digger is a large dog with big paws. Small breeds and puppies can squeeze through gaps that a coarser mesh would never stop, which is where a tighter 1/2-inch grid earns its keep.
The 19-gauge galvanized steel construction is lighter than the Fencer Wire roll above, which makes it easier to bend and shape by hand — a real advantage for smaller installation jobs like a single problem corner rather than an entire perimeter. The half-inch openings are small enough to block paws, snouts, and even most puppy-sized bodies from working through or under a gap, addressing the common scenario where a fence itself is solid but has a small worn channel underneath from years of foot traffic and erosion.
Home-improvement shoppers consistently favor YARDGARD as a trusted hardware-store brand name, and aggregated feedback on similarly specced welded wire products points to reliable holding power for lighter-duty jobs, with the main caveat being that thinner gauges are better suited to small-to-medium dogs than to a 90-pound digger testing the same spot daily.
This is best for owners of small dogs, puppies, or anyone patching a single narrow gap rather than an entire fence line.
Pros:
- ✅ Tight 1/2-inch mesh blocks small paws and snouts
- ✅ Lightweight and easy to shape by hand
- ✅ Trusted, widely available hardware-store brand
Cons:
- ❌ Lighter gauge than heavy-duty rolls, less ideal for large dogs
- ❌ Smaller roll size means multiple purchases for long runs
Expect a price in the $25–$40 range for a 24-inch by 25-foot roll. For small-breed households patching specific gaps, it’s an efficient, low-cost fix.
5. VEVOR Steel Landscape Edging (4-Pack, Hammer-In with Clips) — a rigid curb alternative to concrete
If bending wire isn’t your thing, rigid steel landscape edging offers a straighter, more permanent-feeling barrier without the labor of mixing concrete.
Each strip hammers directly into the ground along the base of your fence, and the included clips connect sections into one continuous rigid wall rather than a bendable mesh. Because the material doesn’t flex the way wire does, it resists a dog pawing or pushing against it in a way that gradually loosens the barrier — the rigidity is the whole point here. The 40-inch strip length with 6-to-8-inch depth options means you can choose shallower coverage for casual scratchers or deeper strips for dogs that dig with real commitment.
Reviews of comparable hammer-in steel edging systems (commonly used for garden borders as well as pet containment) note that installation is fast in soft-to-medium soil but considerably harder in compacted clay or rocky ground, where a few extra minutes with a mallet or a pre-dug starter groove makes a real difference. Buyers also consistently praise the clean, straight look compared to bent wire mesh, which matters if the barrier will be visible along a front-yard fence.
This is best for owners who want a low-maintenance, visually tidy barrier along straight fence runs and don’t mind a moderate price premium for the rigid build.
Pros:
- ✅ Rigid steel resists flexing under repeated digging attempts
- ✅ Clean, straight appearance along visible fence lines
- ✅ Clip-together design speeds up multi-section installs
Cons:
- ❌ Harder to install in rocky or heavily compacted soil
- ❌ Less forgiving on curved or irregular fence lines
Pricing generally runs $30–$50 per 4-pack. For visible fence sections where appearance matters as much as function, it’s a solid middle-ground investment.
6. Vigoro Heavy Duty Metal Landscape Edging with Anchoring Stakes (8 ft) — the polished, premium pick
For anyone who wants the barrier to disappear into the landscaping rather than look like a retrofit, this heavier steel edging with dedicated anchoring stakes is the most finished-looking option on this list.
The powder-coated steel construction resists rust while giving a cleaner black finish than raw galvanized wire, and the dedicated metal anchoring stakes (sold separately or included depending on the kit) drive deep enough to resist frost heave and repeated digging pressure better than lighter clip-in systems. At 8 feet per section, fewer connection points are needed to cover a given stretch of fence, which reduces the weak seams where a persistent digger might eventually find leverage.
What the spec sheet doesn’t say, but real-world use suggests, is that this style of edging was originally designed for garden borders rather than pet containment specifically — so while it performs well as a rigid barrier, it wasn’t purpose-built with tine depth or dig-resistance testing the way the Dig Defence panels were. Home Depot customer feedback on this product line frequently praises the sturdy, “worth every penny” build quality, while also noting that the included stakes can be tricky to detach from the strip during install and benefit from pliers and gloves.
This is best for owners prioritizing curb appeal alongside function, particularly for fences that face the street or a neighbor’s yard.
Pros:
- ✅ Premium powder-coated finish blends into landscaping
- ✅ Longer 8-foot sections mean fewer weak seams
- ✅ Deep anchoring stakes resist frost heave and shifting
Cons:
- ❌ Not purpose-engineered specifically for dig resistance
- ❌ Stakes can be stiff to separate from the strip during setup
Typical pricing sits around $25–$45 per 8-foot section, with multiple sections needed for full coverage. It’s a strong pick when appearance is a real priority, not just an afterthought.
7. GRELWT No-Dig Animal Barrier Fence (24″ x 15″, 5-Pack) — the budget-friendly starter option
Not every household needs to armor an entire fence line on day one. For testing the waters or patching a single trouble spot without a big spend, this compact no-dig barrier pack keeps costs low.
Each panel spans 24 inches long by 15 inches deep, driven into the ground with 2-inch tine spacing similar in concept to the pricier Dig Defence panels, just at a smaller scale and lower price point. A 5-pack covers about 10 feet, which is realistically enough for one problem corner or a single gate gap rather than a full perimeter — but that’s exactly the use case where it shines, letting you address the specific spot your dog has already targeted without committing to a whole-yard project.
Aggregated feedback on this style of budget no-dig barrier tends to be positive for light-to-moderate diggers and smaller breeds, with the honest caveat that lighter-gauge steel at this price point isn’t built to the same durability standard as premium options, and buyers with large or extremely persistent dogs may need to step up to a heavier-duty product after testing this one.
This is best for budget-conscious owners with a single known problem area rather than a whole fence line to protect, or anyone wanting to trial the no-dig concept before investing more.
Pros:
- ✅ Low cost of entry for testing the no-dig approach
- ✅ No tools or trenching needed for installation
- ✅ Doubles as decorative garden-style fencing
Cons:
- ❌ Lighter gauge than premium options, less suited to large dogs
- ❌ Small coverage area means multiple packs for full perimeters
Expect pricing around $20–$35 for a 5-pack. As a low-commitment starting point, it’s a sensible way to confirm the approach works for your dog before scaling up.
Looking across all seven picks, there’s a clear pattern: the Dig Defence Original Animal Barrier Fence and its Large/XL sibling are purpose-built for dig resistance and worth the premium for determined escape artists, while the Fencer Wire roll and YARDGARD hardware cloth offer the best value per linear foot for owners willing to trench. The VEVOR and Vigoro steel edging options trade some dig-specific engineering for a cleaner look and easier long-run installation, and the GRELWT pack is the right low-risk starting point if you’re not yet sure how serious your dog’s digging problem really is.
“This finally worked after three other things failed,” is a sentiment echoed across multiple aggregated reviews of no-dig barrier products — a reminder that layering methods, rather than relying on one fix alone, is often what actually solves a persistent digging problem.
How to Install a No-Dig Barrier Along Your Fence Line
Installing most no-dig stake barriers is genuinely a weekend project, not a professional job — but doing it right the first time saves you from redoing sections later.
Start by walking your fence line and marking every spot with visible digging evidence: worn dirt, existing holes, or areas where your dog spends unusual amounts of time sniffing or pacing. These are your priority zones even if you eventually plan to cover the whole perimeter. Clear a narrow strip of grass, mulch, or debris along the base of the fence so the panels or mesh sit flush against the ground rather than riding up over roots or rocks.
For stake-style barriers like Dig Defence panels, simply align the top edge against your fence and press or tap the tines straight down until the panel sits flush. Overlap adjacent panels by at least an inch to avoid gaps a nose or paw could exploit — this is the single most common installation mistake, and it defeats the entire purpose of a “seamless” barrier. For wire-mesh L-footers, dig a shallow trench 6 to 12 inches deep and roughly the same distance out from the fence, bend the mesh into an L-shape, and backfill so the horizontal foot lies just beneath the topsoil.
After installation, watch your dog’s behavior for the first week. A short burst of renewed digging attempts right at the barrier’s edge is common and usually fades once your dog learns the ground has changed. If digging continues at a specific spot, that’s a sign of a gap or a section that needs reinforcing, not a sign the method has failed.
Real-World Scenarios: Matching the Right Barrier to Your Dog
Different dogs, yards, and budgets call for different solutions, and seeing a few realistic profiles side by side can make the decision easier than specs alone.
Consider a family with a young Beagle in a suburban yard on a modest budget. Beagles are scent-driven diggers by breeding, and this household needs a fast, affordable fix they can install themselves in an afternoon. The budget-friendly GRELWT No-Dig Animal Barrier Fence or a single roll of YARDGARD hardware cloth targeting the two or three spots the dog already favors is a proportionate response — no need to armor the entire yard when the digging is concentrated and the dog is under 30 pounds.
Now picture a rural property with a 75-pound Husky mix known for escaping at least once a month, where the owner has already tried a standard chain-link fence with no luck. This is a case for the heavier-duty Dig Defence Large/XL Animal Barrier Fence across the full perimeter, potentially reinforced with the Fencer Wire L-footer method in the highest-traffic escape zones. The higher upfront cost is justified by the dog’s size, strength, and demonstrated determination.
Finally, think about a homeowner with a front-yard picket fence where appearance matters as much as containment, and a moderate-energy dog that digs occasionally out of boredom rather than a serious escape drive. Here, the Vigoro Heavy Duty Metal Landscape Edging or VEVOR Steel Landscape Edging strikes the right balance — rigid enough to deter casual digging while blending into curb-facing landscaping rather than looking like an obvious retrofit.
Buyer Decision Framework: Which Bottom-of-Fence Solution Fits Your Yard
If you’re still unsure which direction to take, a simple priority checklist can cut through the noise faster than comparing spec sheets line by line.
If your dog weighs under 30 pounds and digs occasionally, choose a lightweight no-dig panel or small-mesh hardware cloth because the digging pressure is lower and a lighter-gauge product will hold up fine. If your dog is over 50 pounds and has already escaped multiple times, choose a heavy-gauge barrier like the Large/XL panels or a buried L-footer because lighter products are likely to bend or be pushed through with sustained effort. If your fence line is long and mostly out of view, prioritize cost-per-foot and choose a DIY wire-mesh roll, since labor is your main cost and material efficiency matters most. If your fence faces the street or a shared property line, prioritize appearance and choose rigid steel edging, since a visibly patched fence can affect curb appeal and even neighbor relations. If you’re not yet sure how serious the problem is, start with a small, affordable pack on the worst single spot before committing to a full-perimeter overhaul — it’s cheaper to learn from a $25 test than a $250 mistake.
How to Choose a Dog-Proof Bottom-of-Fence Solution
With the products and scenarios above in mind, here’s a step-by-step framework for narrowing down your choice.
- Identify why your dog digs. Escape-driven digging, prey-driven digging, and boredom digging call for different intensities of barrier, and sometimes different behavioral interventions alongside the physical fix. The American Kennel Club’s guide to digging behavior is a useful starting point for understanding your dog’s specific motivation before you buy anything.
- Measure your dog’s strength, not just its size. A determined 25-pound terrier can sometimes out-dig a lazy 60-pound dog, so match the barrier’s gauge and depth to observed behavior rather than weight alone.
- Walk the entire fence line, not just the obvious spot. Dogs often develop a backup escape route once their first one is blocked, so plan for full coverage even if you start with a single high-priority section.
- Decide between speed and permanence. No-dig stake panels install in an afternoon with zero digging on your part; buried wire mesh takes longer but tends to last longer under sustained pressure.
- Factor in soil type. Rocky or heavily compacted soil makes trenching and stake-driving harder, which may tip the decision toward a product designed for easier installation.
- Set a realistic budget for full coverage, not just the first section. It’s easy to underestimate total cost by pricing only a single pack; multiply by the number of packs needed for your actual perimeter before comparing options.
- Plan for combination solutions. The most durable setups often layer methods — a buried wire footer plus a stake barrier at the highest-risk corner, for example — rather than relying on a single product to do everything.
Common Mistakes to Avoid When Dog-Proofing the Bottom of a Fence
Even with the right product, a handful of avoidable errors account for most reported failures.
The most frequent mistake is leaving gaps between panels or mesh sections. A barrier is only as strong as its weakest seam, and a half-inch gap is more than enough for a motivated paw to find and exploit within days. A close second is underestimating depth — burying a barrier only 3 or 4 inches down might stop a casual scratcher but won’t slow a dog that’s already dug a foot-deep hole in that exact spot before. Skipping the trench for wire-mesh L-footers is another common shortcut that undermines the whole method, since laying mesh directly on top of the soil rather than beneath it gives a determined dog something to simply push aside rather than dig through.
Owners also frequently forget gate bottoms, which tend to have larger natural gaps than the rest of the fence and are a favorite exit point. Finally, installing a barrier and assuming the job is done — without addressing the underlying reason your dog digs in the first place — often means the same behavior simply relocates to a new, unprotected section of fence.
No-Dig Stake Barriers vs Buried Wire Mesh vs Concrete Curbs
These three approaches solve the same basic problem in different ways, and understanding the trade-offs helps explain why so many households eventually use more than one.
No-dig stake barriers, like the Dig Defence panels covered above, win on installation speed and reversibility — no trenching, no permanent change to your yard, and if you move or change your fence layout, the panels come right back out. Their limitation is depth: most stake barriers only extend 8 to 15 inches below grade, which stops the majority of dogs but can eventually be defeated by an extremely persistent large breed given enough time and motivation.
Buried wire mesh L-footers trade installation ease for superior long-term holding power, since the horizontal footer extends outward rather than just downward, meaning a dog has to dig both deeper and further out to get under it — a combination most dogs give up on quickly. The trade-off is labor: trenching even a modest fence line takes real time and effort, and the material needs to be properly secured to avoid shifting.
Concrete curbs are the most permanent and most labor-intensive option, essentially eliminating the dig-under vulnerability entirely once cured. They’re also the least flexible choice if you ever want to change your fence line, the most expensive for large properties, and arguably overkill for anything short of a documented, repeated-escape situation. For most households, a no-dig stake barrier or wire mesh footer solves the problem at a fraction of the cost and effort.
What to Expect: Everyday Performance After Installation
Specs on a package only tell part of the story — what actually happens once a barrier is in the ground day to day matters more.
In the first week or two, it’s common for dogs to test the new barrier at the exact spot they used to dig, sometimes with renewed enthusiasm as if trying to figure out what changed. This isn’t a sign of failure; it typically fades as the dog learns the ground has become unrewarding to dig in that location. Over the following weeks, most owners report the digging behavior either stops entirely at protected spots or shifts briefly to an unprotected section — which is exactly why full perimeter coverage, or at minimum coverage of every known trouble spot, matters more than treating a single hole.
Seasonally, expect some maintenance. Frost heave in colder climates can gradually loosen stake barriers over winter, and heavy spring rain can wash soil away from buried wire footers, temporarily exposing an edge. A quick walk-through each spring to re-seat any shifted panels or add soil back over an exposed footer keeps the barrier working at full strength year-round.
Dog-Proof Fencing for Different Breeds and Yard Types
Not every yard — or every dog — needs the same approach, and breed tendencies plus yard layout both shape the right call.
High-energy terriers, dachshunds, and other breeds developed for underground hunting tend to dig with real persistence and often benefit from the heaviest-duty barriers regardless of their size, since motivation matters as much as raw strength. Large working breeds like Huskies and German Shepherds combine strength with stamina, making the reinforced Dig Defence Large/XL panels or a properly trenched wire footer a better long-term investment than a lighter-duty product that may need replacing. Smaller companion breeds and puppies are often better served by tight-mesh hardware cloth that blocks small gaps rather than heavy-gauge barriers designed for larger dogs, since the goal is closing off narrow openings rather than resisting brute force.
Yard layout matters too. Sloped yards often develop natural gaps at the fence base as soil erodes downhill, making flexible wire mesh — which can follow the contour of the ground — a better fit than rigid steel edging designed for flat, straight runs. Corner lots and yards backing onto wooded or undeveloped land tend to see more digging overall, since wildlife scent trails can trigger prey-driven digging even in dogs that otherwise show little interest in escaping.
✨ Found the right match for your dog? Check current pricing on the barrier that fits your yard — then let your dog have the run of the place, worry-free.
Long-Term Cost and Maintenance
Sticker price only tells part of the cost story. A cheap barrier that needs replacing every year can end up costing more over five years than a pricier option installed correctly once.
No-dig stake panels in the $20–$45 price range per small pack are inexpensive individually but add up quickly across a full perimeter — a typical suburban backyard might need $150–$300 in panels total, plus the possibility of replacing bent or corroded sections every few years for lighter-gauge products. Heavier-duty panels and buried wire mesh cost more upfront but tend to need less frequent replacement, especially when properly galvanized steel is used; hot-dip galvanizing in particular is well documented as providing strong long-term corrosion resistance for outdoor steel products, which directly translates to a longer service life for buried barriers exposed to constant soil moisture, as explained in this overview of hot-dip galvanizing.
Maintenance costs are generally low across all these options — an occasional re-seating of a shifted panel, topping off soil over an exposed footer, or replacing a single damaged section rather than the whole system. Compared to the cost of a lost dog (vet bills if injured, time spent searching, or worse), even the priciest option on this list is a modest investment in peace of mind.
Safety, Regulations, and Standards for Backyard Fencing
Before installing any bottom-of-fence barrier, a few practical safety and regulatory points are worth checking.
Cut wire mesh edges can be sharp, so any exposed cut ends should be bent inward, filed smooth, or capped to avoid injuring paws or hands during installation and beyond. Galvanized steel products are generally considered safe for outdoor pet-adjacent use since the zinc coating is inert once cured, but freshly cut or damaged coating can expose bare steel that’s more prone to rust over time — another reason to finish cut edges properly. If your property is governed by a homeowners’ association, it’s worth a quick check of your HOA’s architectural guidelines before installing visible steel edging or panels, since some associations regulate fence-adjacent modifications even when the change is minor. Local municipal codes occasionally address fence height and material but rarely regulate below-grade dig barriers specifically, though it’s always worth a quick check with your local building department if you’re doing a large-scale, permanent installation like a concrete curb.
For dogs with a strong escape drive tied to anxiety or fear rather than simple boredom, a physical barrier alone may not fully resolve the underlying issue — according to San Diego Humane Society resources on escape behavior in dogs, jumping, climbing, digging, and chewing through barriers can all stem from the same underlying motivations, so addressing why a dog wants to leave the yard is just as important as reinforcing how they might do it.
Frequently Asked Questions
❓ What's the best way to dog proof the bottom of a fence?
❓ How deep should a barrier go to stop a dog from digging under a fence?
❓ Can I dog proof the bottom of a fence without digging a trench?
❓ Will a dog proof fence barrier work for a large, powerful dog?
❓ How much does it cost to dog proof the bottom of a fence?
Conclusion
A dog proof bottom of fence setup doesn’t have to mean a total fence overhaul or a weekend lost to concrete mixing. For most dogs and most yards, a no-dig stake barrier or a properly trenched wire mesh footer solves the problem completely — the trick is matching the product’s strength and depth to your specific dog’s size and determination rather than grabbing whichever option is cheapest or most convenient.
Start by identifying your dog’s actual trouble spots, choose a barrier suited to their size and digging intensity, and don’t be afraid to layer methods if one alone isn’t holding. Whether you land on the tool-free Dig Defence Original Animal Barrier Fence, the heavy-duty Dig Defence Large/XL version, a DIY Fencer Wire or YARDGARD mesh footer, or the more polished VEVOR or Vigoro steel edging, the goal is the same: a yard your dog can enjoy safely, without the daily anxiety of wondering if today’s the day they finally get out.
Recommended for You
- Shock Collar for German Shepherd: 7 Top Training Collars Compared
- 7 Best GPS Dog Collars Fence Picks for 2026 (No More Escapes)
- 4G GPS Tracker Guide: 7 Best Real-Time Picks for 2026
Disclaimer: This post contains affiliate links. As an Amazon Associate, I earn from qualifying purchases made through these links, at no additional cost to you.
✨ Found this article helpful? Share it with someone who needs it! 💬🤗